The anxiety journalists feel in a studio isn’t due to complex technology, but a communication gap with the technical team.
- Mastering a few core principles—like three-point lighting and the difference between gain and volume—provides the language to collaborate effectively.
- Developing pre-emptive troubleshooting habits for common failures, like a dead prompter, builds on-air confidence more than memorizing specifications.
Recommendation: Focus on mastering one concept at a time, starting with audio, as it’s the most common and least forgiving point of failure in a live broadcast.
The studio lights are hot, a dozen screens flicker with data, and someone in the control room is counting down in your ear. As a journalist, your focus is on the story. Yet, you’re surrounded by an intimidating array of faders, cables, and monitors. You’re not an engineer, and the fear of touching the wrong button or not knowing how to describe a technical problem is real. It can undermine your confidence right when you need it most.
Many will tell you to “just learn the jargon” or wade through dense technical manuals. This approach often fails because it misses the point. The goal isn’t for you to become a broadcast engineer. It’s for you to develop enough operational confidence to communicate effectively with the crew, anticipate common issues, and stay in control of your broadcast, even when things go wrong.
But what if the key wasn’t about memorizing every cable type, but understanding the *principles* behind a clean signal? What if you could solve 80% of your technical anxieties by mastering just a few core concepts? This guide is designed to be that bridge. We’re not building a full-fledged engineer; we’re building a confident journalist who can speak the language of the control room and troubleshoot with poise.
We’ll walk through the foundational pillars of technical production, from making yourself look and sound professional to handling on-air emergencies. We will also explore how modern workflows and even your smartphone can be powerful tools in your arsenal, all without needing an engineering degree.
Summary: A Journalist’s Guide to Technical Production Mastery
- Three-Point Lighting: The Simple Setup That Makes You Look Pro on Cam
- Gain vs. Volume: The Audio Mistake That Ruins Your Live Feed
- What to Do When the Prompter Dies Live on Air?
- How to Clean Your Sensor Without Destroying Your Camera?
- XLR, HDMI, SDI: A Guide to Cables for Non-Techies
- Why Your Smartphone Sensor Is Better Than a 5-Year-Old Broadcast Camera?
- RAM or GPU: Which Component Matters Most for Smooth 4K Rendering?
- How to Produce a Cross-Media Story Without Tripling Your Workload?
Three-Point Lighting: The Simple Setup That Makes You Look Pro on Cam
Before you say a single word, your lighting sets the tone. Poor lighting can make a high-end broadcast camera look cheap, creating distracting shadows and flattening your features. The universal solution, used from Hollywood to network news, is the three-point lighting system. It’s a simple concept that, once understood, gives you the power to ensure you always look professional, whether in-studio or on a remote hit.
The system consists of three lights: the Key, the Fill, and the Backlight. The Key Light is your main, brightest light, placed to one side of the camera to create shape and dimension on your face. The Fill Light is a softer light placed on the opposite side, designed to “fill in” the shadows created by the key light without creating new ones. The professional standard is to have your fill light be about half as bright as your key, which is why the industry standard lighting ratio recommends a 2:1 relationship between them. Finally, the Backlight (or hair light) is placed behind you to separate you from the background, adding depth and preventing you from looking like a cardboard cutout.
Understanding this setup is a game-changer. You don’t need a full studio to achieve it. In a pinch, a window can serve as your key light, a white piece of cardboard can bounce light back as your fill, and a simple desk lamp can act as your backlight. Knowing the *principle* allows you to be resourceful and communicate exactly what you need to a technician: “The key light feels too harsh,” or “I think I need a little more backlight to separate me from the wall.”
Gain vs. Volume: The Audio Mistake That Ruins Your Live Feed
Nothing kills a broadcast faster than bad audio. If viewers can’t hear you clearly, they’re gone. The single most common audio mistake made by non-technicians is confusing gain and volume. They seem similar, but they control two fundamentally different things. Understanding the difference is the key to achieving clean, professional audio and preserving your signal integrity from the microphone all the way to the audience.
Think of it like cooking. Gain is the quality of your raw ingredients. It’s the level of the audio signal at the very beginning of the chain, right at the microphone preamp. If your gain is too low, your signal is weak and full of background noise (hiss). If it’s too high, the signal becomes distorted and “clips,” creating a harsh, crackling sound that is impossible to fix later. Volume, on the other hand, is the serving size. It controls the loudness of the *final product* coming out of the speakers. You can always turn the volume up or down, but you can’t fix a distorted ingredient once it’s been cooked.
Your job is to provide the audio engineer with a clean, healthy signal. The rule is simple: set your gain first. Speak into the microphone at the level you’ll be using on-air and have the technician adjust the gain until the level is strong without ever hitting the red “peak” or “clip” lights on the mixer. Once the gain is set, don’t touch it. All subsequent adjustments for the monitor in your ear or the final broadcast output should be made with volume faders.
This table breaks down the core differences for a quick reference.
| Aspect | Gain | Volume |
|---|---|---|
| Function | Input signal strength | Output loudness control |
| Position in chain | Beginning (source) | End (output) |
| Affects | Signal-to-noise ratio | Perceived loudness only |
| Can cause | Distortion/clipping | Speaker distortion only |
| Optimal level | -18 to -12 dBFS digital | User preference |
What to Do When the Prompter Dies Live on Air?
It’s every on-air professional’s nightmare. You’re mid-sentence, delivering a complex piece to camera, and the words on the teleprompter freeze, then vanish. Panic is the natural reaction, but the difference between a pro and an amateur is how you handle this exact moment. The solution isn’t magic; it’s pre-emptive troubleshooting and preparation.
The first rule when the prompter dies is: do nothing. Do not break eye contact with the camera. Do not show panic on your face. Take a calm breath, finish your sentence from memory, and seamlessly transition to your backup. Your audience will only know something is wrong if you tell them with your reaction. A moment of confident silence is infinitely better than a flustered “Oh, my prompter is down.”
Your backup system should be a non-negotiable part of your workflow. This doesn’t have to be complex. Many seasoned journalists rely on low-tech solutions that are nearly foolproof. Having a printed outline with key bullet points taped to your desk just below the camera lens is a classic for a reason. A tablet or even a smartphone with your script in a notes app can also serve as a secondary prompter, ready to go at a moment’s notice. The key is to have it within your line of sight and practiced using it.
This kind of preparation builds the confidence you need to stay in command. As one veteran anchor shared after a critical failure during a breaking news report:
A news anchor reported that keeping printed bullet points taped just below the camera saved their broadcast when the prompter crashed during breaking news coverage, allowing seamless continuation without viewers noticing the technical failure.
– Live broadcaster recovery experience
How to Clean Your Sensor Without Destroying Your Camera?
You’ve noticed persistent, mysterious dark spots on your video feed, always in the same place no matter which lens you use. The bad news is you have dust on your camera’s sensor. The good news is that it’s often fixable. However, this is one area where a little knowledge can be a dangerous thing. The sensor is the most delicate and expensive part of your camera, and improper cleaning can cause permanent, costly damage.
Before you do anything, you need to confirm the problem. The easiest way is the “F22 Sky Test.” Set your lens to its narrowest aperture (like f/22), point it at a clear, bright surface like the sky or a white computer screen, and take a picture. The narrow aperture will make any dust particles on the sensor appear as sharp, dark spots. This tells you the problem is indeed sensor dust.
When it comes to cleaning, the golden rule is to use the least invasive method first. Never, ever use canned air, as the propellant can spray onto the sensor and cause irreversible damage. A simple, hand-powered rocket blower should always be your first tool. With the camera’s sensor-cleaning mode activated (which locks the mirror up), hold the camera with the lens mount facing down and use the blower to dislodge any loose particles. Often, this is all you need.
Your Action Plan: Safe Sensor Cleaning Procedure
- First perform the ‘F22 Sky Test’ – shoot a blank sky at f/22 to reveal dust spots.
- Use a rocket blower first to remove loose particles without contact.
- If needed, use sensor-specific swabs with appropriate cleaning fluid for your camera model.
- Never use canned air, cotton swabs, or general-purpose alcohol-based cleaners.
- Seek professional cleaning for oil streaks or any contamination that doesn’t come off easily.
If the blower doesn’t work, you might be tempted to use a sensor swab. This is where you must be honest about your skill level. As one expert technician advises, sometimes the best tool is the phone.
Professional sensor cleaning can cost between $50-100 but is worth it for expensive equipment when dealing with stubborn contamination that could damage the sensor if improperly cleaned.
– Camera Service Technician, Professional Camera Repair Guide 2024
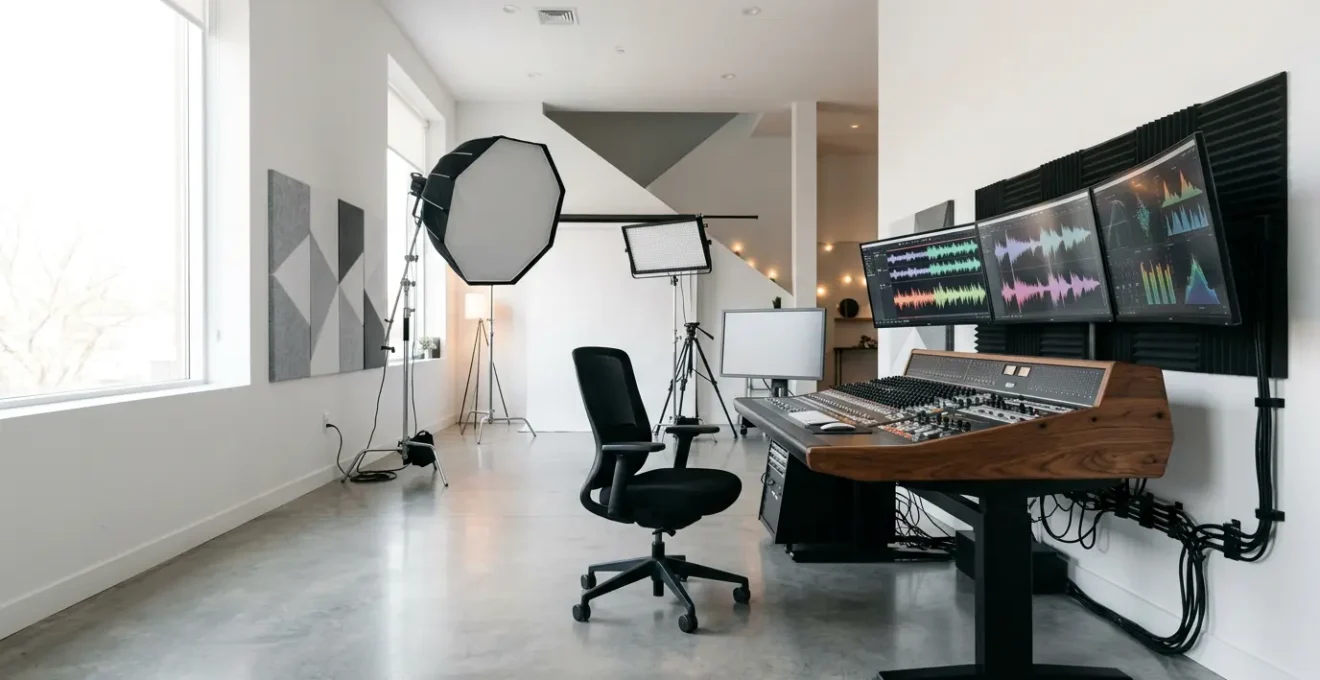
XLR, HDMI, SDI: A Guide to Cables for Non-Techies
Walking into a control room or looking behind a broadcast rack can feel like confronting a snake pit of cables. For a non-technician, it’s an intimidating mess. The secret is that you don’t need to know what every single cable does. You just need to understand the “big three” that handle 99% of professional audio and video signals: XLR, SDI, and HDMI. Knowing what each is for, and its limitations, allows you to troubleshoot signal-flow problems effectively.
XLR is the undisputed king of professional audio. It’s the thick cable with the three-pin circular connector you plug into microphones. Its key feature is that it carries a “balanced” audio signal, which allows it to run for very long distances (hundreds of feet) without picking up interference or noise. If you have an audio problem, checking that the XLR is securely clicked into place at both the mic and the wall plate (or mixer) is step one.
For video, the battle is between HDMI and SDI. HDMI is the consumer standard, found on your TV and laptop. It’s great for short distances, like connecting a camera to a nearby monitor, but it becomes unreliable after about 25 feet. The connectors are also friction-fit and can be easily pulled out. SDI is the broadcast professional’s choice. It uses a robust, locking BNC connector and can carry a high-quality video signal for 300 feet or more. If your camera feed is going to a control room switcher, it’s almost certainly using SDI.
This quick-reference guide will help you keep them straight.
| Cable Type | Best Use | Max Distance | Signal Type |
|---|---|---|---|
| XLR | Professional audio/microphones | 100+ feet | Balanced audio |
| HDMI | Consumer video/monitors | 25 feet reliable | Digital video+audio |
| SDI | Broadcast video | 300+ feet | Professional video |
| USB-C | Computer connections | 6 feet typical | Data/video/power |
Why Your Smartphone Sensor Is Better Than a 5-Year-Old Broadcast Camera?
It sounds like heresy in a broadcast environment, but it’s a question worth asking. How can the tiny sensor in your iPhone or Android device produce an image that often looks just as good, if not better, than a professional camera from just a few years ago? The answer isn’t in the hardware itself, but in the revolutionary power of computational photography.
A traditional broadcast camera relies on a large sensor and high-quality optics to capture a single, high-quality frame of video. It’s a hardware-first approach. Your smartphone knows its sensor is tiny and its lens is a compromise, so it takes a software-first approach. When you press record, it’s not just capturing one video stream. It’s capturing multiple frames simultaneously at different exposures and running them through incredibly powerful processors.
This software instantly analyzes the frames, merges the best parts, reduces noise, enhances colors, and stabilizes the image in real-time. It’s performing tasks that, a decade ago, would have required a powerful editing computer and hours of work. This is why smartphone video can have such stunning dynamic range, with clear details in both the bright sky and dark shadows, a feat that older professional cameras struggled with. A perfect example is how modern phones handle difficult lighting. According to a deep dive into phone camera technology, the Pixel 8a’s 64MP sensor and Tensor G3 processor heavily leverage Google’s advanced computational features to produce incredible photos and videos that defy the sensor’s small physical size.
Does this mean you should replace a modern broadcast camera with a phone? Not for most professional work, as pro cameras still offer superior control, lens options, and connectivity (like SDI and XLR). But it does mean that for quick social media hits, backup angles, or even primary web-streaming, the device in your pocket is a more powerful tool than you might think. It’s a testament to the fact that today, software is just as important as the lens.
RAM or GPU: Which Component Matters Most for Smooth 4K Rendering?
When your broadcast involves live graphics, video roll-ins, or streaming in high quality like 4K, the performance of your computer is critical. A stuttering or frozen feed can derail a segment. Many journalists assume that adding more RAM is the solution to all performance problems. While RAM is important, for modern video workflows, the real hero is the GPU (Graphics Processing Unit).
Think of your computer’s components as a kitchen crew. The CPU (Central Processing Unit) is the head chef, managing all the general tasks. RAM (Random-Access Memory) is the counter space. More RAM means you can have more ingredients (assets like videos, graphics, audio files) out and ready to use at the same time. If you don’t have enough counter space, the chef has to constantly fetch things from the pantry (your slow hard drive), which slows everything down.
The GPU, however, is a specialized sous-chef who only knows how to do one thing, but does it incredibly fast: process visual information. Tasks like rendering video effects, encoding a live stream, or playing back 4K footage are what the GPU was born to do. Modern GPUs have dedicated hardware encoders (like NVIDIA’s NVENC) that are far more efficient at these tasks than the generalist CPU.
For live streaming or rendering, a powerful GPU will have a much greater impact than simply adding more RAM beyond a certain point. A system with 16GB of RAM and a great GPU will almost always outperform a system with 64GB of RAM and an entry-level GPU for video tasks. As one analyst puts it, the roles are clear.
For live streaming, the GPU with its dedicated encoder like NVENC is your hero, while RAM helps juggle multiple assets but won’t fix encoding bottlenecks.
– Tech Hardware Analyst, Streaming Hardware Guide 2024
If you’re experiencing stuttering during a live stream, the bottleneck is most likely your GPU or CPU’s ability to encode the video in real-time, not a lack of RAM (assuming you have at least 16GB). Prioritizing a machine with a powerful GPU is the smartest investment for smooth, professional video production.
Key Takeaways
- Mastering three-point lighting is the fastest way to look professional on camera, regardless of equipment.
- Audio quality is paramount: ‘Gain’ controls the input quality, while ‘Volume’ controls the output loudness. Get the gain right first.
- Always have a low-tech backup for critical systems like the teleprompter; confidence comes from preparation, not perfect technology.
How to Produce a Cross-Media Story Without Tripling Your Workload?
In today’s media landscape, a single story needs to live everywhere: as a live broadcast, a podcast, a YouTube video, and a series of clips for social media. The traditional approach of creating each of these assets separately is a recipe for burnout. The modern, efficient solution is to adopt a “record once, publish everywhere” mindset, using smart workflows and tools to atomize your content.
The core idea is to structure and record your primary content in a way that makes it easy to repurpose. Instead of one long, monolithic segment, think in modular blocks of 60-90 seconds. This makes it simple to extract compelling moments for social clips later. The real magic, however, happens with software like OBS Studio (Open Broadcaster Software), which can act as a central production hub.
A prime example of this workflow in action is a content creator who uses a multi-output strategy. During a single live-streamed interview, they use OBS to:
- Stream the main 16:9 widescreen show to YouTube.
- Simultaneously record a high-quality, clean master file to their hard drive for archival.
- Capture a separate, vertically cropped version of the feed (9:16) specifically for TikTok or Instagram Reels.
- Record a clean, audio-only version of the conversation for release as a podcast.
This strategy, as documented in a case study on efficient production, can reduce post-production time by up to 80%. Instead of three or four separate production cycles, you have one. By adding AI transcription tools to this workflow, you can even generate automatic show notes, blog posts, and text-based social media updates from the same single recording session. This is how you produce a cross-media story without tripling your workload; you build a system where technology does the heavy lifting.
Stop letting technology intimidate you. The goal was never to become an engineer, but to become a more confident and capable journalist in a technical environment. Start with one of these principles this week—master your three-point lighting or perfect your audio levels. The confidence you build is the first and most important step toward commanding the studio.