In summary:
- Your phone’s computational power already surpasses older broadcast gear; the key is unlocking it with professional techniques.
- Mastering stability and audio is non-negotiable. Use body mechanics and the right microphone for the situation.
- Professionalism lies in workflow discipline: systematic media management and efficient mobile editing are what separate amateurs from pros.
- With the right apps and a clear process, you can create a complete “Field-to-Air” pipeline entirely on mobile devices.
The dream of the Mobile Journalist (MoJo) has always been freedom: the power to report from anywhere, unburdened by heavy equipment, and to publish stories at the speed of life. Yet, this freedom is often haunted by a fear—the fear that “mobile” means “amateur.” Many believe that producing true broadcast-quality content requires a van full of gear and a dedicated crew. We’re told to get the latest phone, buy a few popular apps, and hope for the best, but this advice misses the fundamental point.
The revolution isn’t just in your pocket; it’s in the process. A smartphone is no longer a compromise; it’s a strategic choice. Thanks to explosive advancements in computational photography and mobile processing, the device in your hand is a complete mobile studio. The real gap between a shaky, noisy phone video and a polished news package isn’t the hardware—it’s the workflow. It’s about instilling the discipline of a broadcast professional into the nimble, powerful ecosystem of your phone.
This guide isn’t about which phone to buy. It’s about mastering the professional workflow that turns any modern smartphone into a reliable tool for broadcast journalism. We will deconstruct the entire process, from capturing stable, crystal-clear footage in the field to editing and delivering a finished package before you even get back to the office. This is how you stop being someone who shoots video with a phone and start being a journalist who shoots with a mobile studio.
This article breaks down the essential pillars of the professional mobile journalism workflow. The following summary provides a direct path to each core skill you need to master to transform your smartphone into a broadcast-ready tool.
Summary: How to Produce Broadcast-Quality News Using Only a Smartphone?
- Why Your Smartphone Sensor Is Better Than a 5-Year-Old Broadcast Camera?
- How to Shoot Stable Footage Without a Heavy Tripod in the Field?
- Lavalier or Shotgun Mic: Which One to Plug into Your Phone for Interviews?
- The Storage Mistake That Kills Your Shoot Halfway Through the Day
- How to Edit a 2-Minute Package on Your Phone While Commuting Back?
- The Best USB-C Microphones for Android Phones in 2024
- What Are Proxies and Why Are They Essential for 4K Editing on Laptops?
- How to Launch a Professional Podcast Using Only Mobile Equipment?
Why Your Smartphone Sensor Is Better Than a 5-Year-Old Broadcast Camera?
Let’s dismantle a core myth: that a bigger camera is always a better camera. While a large sensor has physical advantages in light gathering, the real magic today happens after the photons hit the sensor. This is the domain of computational photography, and it’s where your smartphone has an almost unfair advantage over older, dedicated broadcast cameras. A five-year-old ENG camera had a powerful lens but a relatively “dumb” processor. Your phone, in contrast, is a supercomputer built for imaging.
Every time you take a picture or video, your phone is performing trillions of operations. It’s capturing multiple frames at different exposures for perfect HDR processing, ensuring you don’t lose detail in bright skies or dark shadows. Its AI is performing real-time scene recognition, optimizing color, contrast, and focus for the specific subject you’re shooting. This isn’t just automation; it’s intelligent assistance that traditional cameras are only now starting to adopt. The growth in this field is staggering, as forecasts show the computational photography market demonstrates exponential growth, reaching $95.32 billion by 2033.
Furthermore, modern phones support professional codecs like HEVC/H.265, which deliver quality comparable to broadcast standards at a fraction of the file size. They also offer variable frame rates (24, 30, 60, 120fps) on the fly, a feature that often requires deep menu diving on older pro cameras. The bottom line is that the “brain” in your phone is constantly working to overcome the physical limitations of its small sensor, often producing a final image that is more balanced, vibrant, and ready-to-air than what a much larger, older camera could produce without significant post-production work.
How to Shoot Stable Footage Without a Heavy Tripod in the Field?
The most immediate giveaway of amateur video is shaky footage. The traditional solution is a heavy, cumbersome tripod, the very thing a MoJo seeks to leave behind. The professional mobile solution isn’t a single piece of gear, but a combination of a lightweight rig and, more importantly, intentional filming technique. You must become the tripod.
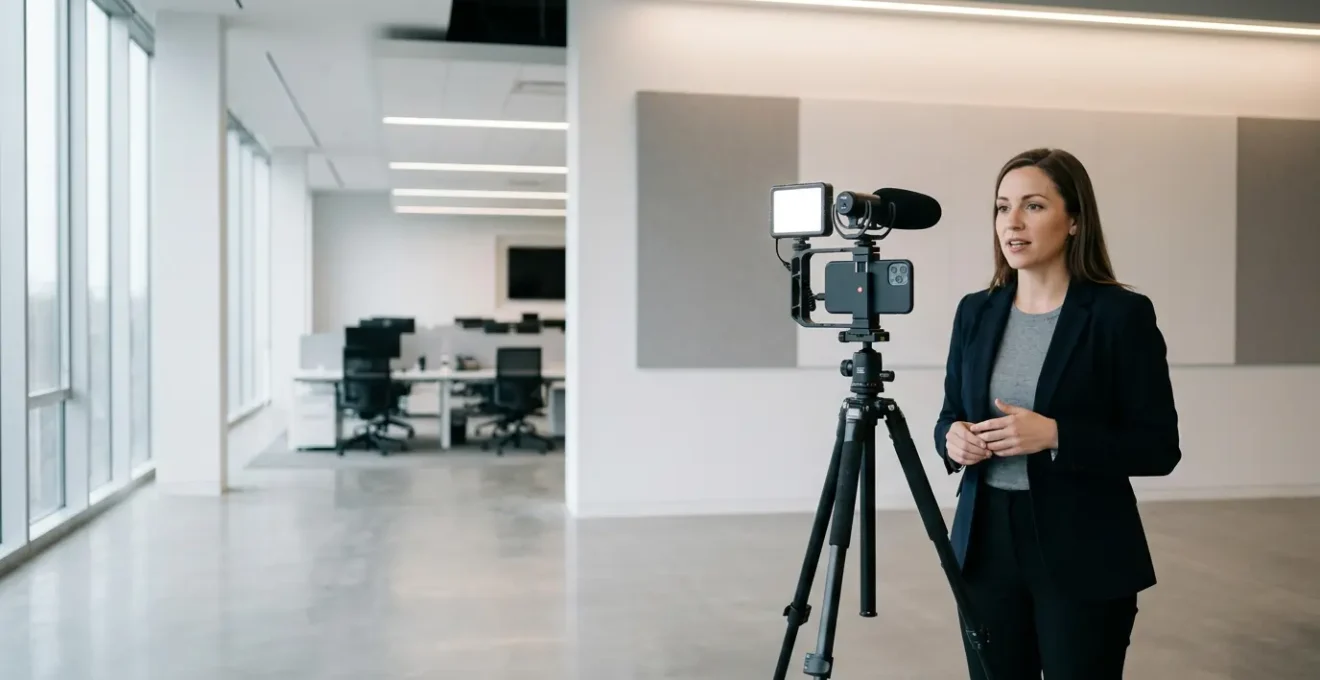
This concept is powerfully demonstrated by Ukrainian journalists who, trained in MoJo techniques, have used smartphone rigs for professional field reporting in the most challenging conditions. Their success hinges on the “human tripod” technique. This involves using a simple, portable metal phone rig for a secure grip and then creating three points of contact with your body. By holding the rig with both hands and tucking your elbows into your torso, you create a stable core. Leaning against a wall, a lamp post, or even kneeling on one knee adds a third point of contact, dramatically increasing stability beyond what you could achieve with handheld shooting.
This image demonstrates the core principle of creating stability through body mechanics and minimal gear, a cornerstone of professional mobile journalism.
As you can see, the focus is on posture and control. The rig itself is secondary to the technique. A good rig provides mounting points for microphones and lights, but its primary job in stabilization is to give you leverage to control the phone with your whole body, not just your wrists. Mastering this turns you from a passive filmer into an active stabilizer, allowing you to capture smooth, professional-looking pans, tilts, and static shots in any environment, without the weight.
Lavalier or Shotgun Mic: Which One to Plug into Your Phone for Interviews?
If shaky video is the first sign of an amateur, poor audio is the nail in the coffin. Viewers will forgive a slightly soft focus, but they will not tolerate muffled, noisy, or inaudible sound. As the team at Photography Tutsplus notes, “Good audio is essential for news video, but it can be difficult to capture with a smartphone alone.” The phone’s internal microphone is designed for calls, not for isolating a subject’s voice in a news-gathering environment. Your choice of an external microphone is therefore not an option; it’s a critical decision that defines your audio quality.
The two workhorses for mobile journalists are the lavalier (or “lav”) microphone and the shotgun microphone. They are not interchangeable. Choosing the right one depends entirely on your scenario, and making the wrong choice can ruin an interview. A lavalier mic clips onto your subject, ensuring a consistent audio level regardless of how they move. A shotgun mic is directional, capturing what it’s pointed at while rejecting sound from the sides. The decision is a trade-off between control and speed.
This decision matrix breaks down the most common journalistic scenarios to help you choose the right tool for the job. Mastering this choice is a key part of your workflow discipline.
| Scenario | Best Choice | Key Advantages | Limitations |
|---|---|---|---|
| Sit-down Interviews | Lavalier Mic | Consistent audio, hands-free for subject | Setup time required |
| Run-and-Gun Questions | Shotgun Mic | Quick deployment, directional pickup | Distance sensitive |
| Crowded Environments | Hypercardioid Shotgun | Isolates voice from background | Requires precise aiming |
| Two-Person Setup | Wireless Lavalier System | Freedom of movement, professional quality | Higher cost, battery dependent |
Ultimately, a professional MoJo should ideally have both a wired lavalier and a compact shotgun mic in their kit. This small investment ensures you can capture broadcast-quality audio in virtually any situation, from a formal sit-down interview to a quick man-on-the-street soundbite.
The Storage Mistake That Kills Your Shoot Halfway Through the Day
You’ve nailed the stability, your audio is pristine, and you’re capturing beautiful 4K footage. Then, the dreaded notification pops up: “Storage Almost Full.” This is more than an inconvenience; it’s a catastrophic failure of workflow that can derail an entire day of reporting. Relying solely on your phone’s internal storage is the single biggest technical mistake a mobile journalist can make. Workflow discipline isn’t just about how you shoot; it’s about how you manage your data from the moment it’s created.
The professional solution is a robust media management strategy that begins before you even leave for the shoot. This involves having a system for offloading, backing up, and organizing your files throughout the day. It’s not about having a phone with more storage; it’s about having a process that makes storage a non-issue. Adopting this discipline ensures you never lose a shot and can always find the clip you need in seconds.
A proactive approach to data is what separates a professional from a hobbyist. It requires planning and the right tools, but it guarantees that technology serves your story, not the other way around. Implementing a rigorous system is the only way to safeguard your work in the field.
Your Action Plan: Professional Mobile Media Management
- Implement the 3-2-1 Backup Rule: Your workflow must ensure you always have at least 3 copies of your footage, on 2 different types of media (e.g., phone and SSD), with 1 copy stored offsite (or at least physically separate from the primary device).
- Use Systematic File Naming: Before you even start, decide on a naming convention. A simple format like YYYYMMDD_Project_Shot_Take (e.g., 20241026_CityHall_Interview_01) makes every file instantly searchable.
- Offload Mid-Day: Don’t wait until the end of the day. During a lunch break, use a portable SSD like a Samsung T7 to transfer all your footage. This frees up phone space and creates your first backup.
- Clear Storage After Confirmed Backup: Only after you have confirmed the footage is safely on two separate drives (e.g., the SSD and a cloud service or another laptop) should you consider deleting files from your phone.
- Monitor Storage Proactively: Make it a habit to check your available phone storage before you start filming each new scene or interview. A five-second check can prevent a thirty-minute crisis.
This systematic approach might seem tedious at first, but it quickly becomes second nature. It’s the digital equivalent of a camera operator cleaning their lenses or a sound tech checking their batteries. It’s the unglamorous but essential work that makes professional journalism possible.
How to Edit a 2-Minute Package on Your Phone While Commuting Back?
The final frontier of the MoJo workflow is the edit. For many, this is where the mobile dream dies, forcing a retreat to a powerful desktop computer. But what if you could edit and deliver a complete, broadcast-ready news package from your phone while on the train or in a coffee shop? This is the promise of the true “Field-to-Air Pipeline,” and it’s made possible by incredibly powerful mobile non-linear editors (NLEs).
Apps like LumaFusion have completely revolutionized mobile editing, transforming it from a tool for simple trims into a full-featured professional suite. The accessibility is astounding; while a desktop NLE subscription can cost hundreds per year, professional mobile editing is accessible with LumaFusion at just a $29.99 one-time purchase. This cost efficiency democratizes access to professional tools, but it’s the features that truly empower the MoJo.
A recent update to LumaFusion, for example, demonstrates capabilities that rival desktop software. Journalists can work with up to 12 video and 12 audio tracks, apply universal color grades with adjustment clips, create smooth slow-motion with speed ramping, and use keyframing for professional animations. Crucially, it allows for direct export to desktop systems like Final Cut Pro via FCPXML, bridging the gap between mobile and studio workflows if a final polish is needed. This is no longer about making compromises; it’s about having a portable, professional-grade edit suite in your pocket.
This image captures the focused, tactile nature of mobile editing—a process of precision and creativity that happens anywhere.
The ability to piece together your narrative, trim clips, add B-roll, mix audio, and create titles during what used to be unproductive travel time is a game-changer. It means you can break a story hours before the competition, delivering a high-quality package directly from the field. It’s the ultimate expression of mobile journalism’s speed and agility.
The Best USB-C Microphones for Android Phones in 2024
While the iPhone has long been a MoJo favorite, the standardization of USB-C on Android devices has unleashed a torrent of professional-grade audio accessories, creating a powerful and versatile ecosystem. For the Android-based journalist, choosing the right USB-C microphone is a critical step in building your mobile studio. The “best” microphone is not a single product, but a category of tool perfectly matched to a specific journalistic task.
Gone are the days of clunky adapters and unreliable connections. Modern USB-C microphones offer a direct, digital connection to your phone, often providing power to the mic and enabling features like zero-latency monitoring through a built-in headphone jack. This allows you to hear exactly what the microphone is recording in real-time, a non-negotiable feature for professional work. Whether you need the freedom of a wireless system for a walk-and-talk interview or the focused pickup of a shotgun mic for run-and-gun reporting, there is a dedicated USB-C solution.
Understanding the different types of USB-C microphones and their ideal use cases is key to building a versatile and reliable audio kit. This table, based on professional field testing, provides a clear guide for matching the gear to the gig.
This comparative guide, based on field-testing from experts like Robb Montgomery, breaks down your options for getting broadcast-quality sound into your Android device. It is a critical component for building a reliable mobile journalism audio kit.
| Use Case | Recommended Type | Key Features | Professional Advantage |
|---|---|---|---|
| Sit-Down Interviews | Wireless Systems (DJI Mic, Rode Wireless GO II) | USB-C adapter included, multi-channel recording | Freedom of movement, backup tracks |
| Run-and-Gun Reporting | Compact Shotgun (Rode VideoMic Me-C) | Direct USB-C connection, windscreen included | Quick deployment, directional audio |
| Studio Voiceover | Dynamic USB-C (Shure MV7) | Zero-latency monitoring, XLR/USB-C dual output | Broadcast-quality audio, versatile connectivity |
| Field Recording | UAC-Compliant Systems | Pass-through charging, headphone monitoring | All-day operation, real-time monitoring |
The key takeaway is that the USB-C standard empowers journalists to build a modular and professional audio setup. You can start with a simple, high-quality shotgun mic and expand your kit as your needs grow, all while maintaining a seamless, digital connection to your primary recording device: your phone.
What Are Proxies and Why Are They Essential for 4K Editing on Laptops?
You’re shooting everything in glorious 4K to capture the most detail, but when you bring those massive files into your editor—even a powerful mobile one—the timeline stutters and playback grinds to a halt. This is the 4K paradox: you need the quality for the final product, but it cripples the editing process. The solution is one of the most powerful and misunderstood concepts in professional video editing: the proxy workflow.
A proxy is simply a lower-resolution copy of your original high-resolution file. Instead of editing the huge 4K files, you edit with these small, lightweight 1080p proxy files. Your computer or phone can handle these smaller files with ease, giving you a smooth, responsive editing experience. You can slice, dice, color correct, and add effects without any lag. Then, once your edit is complete and locked, you perform a final, magical step: you “relink” the edit to the original 4K files. The editing software applies all your cuts and effects to the high-quality source media, exporting a final master in full 4K resolution.
This isn’t a workaround; it’s the standard, accepted workflow used in Hollywood and broadcast television for decades. Adopting it is a mark of workflow discipline. The process for a MoJo is straightforward:
- Shoot in 4K: Capture your footage in the highest quality possible using an efficient codec like H.265/HEVC.
- Create Proxies: Use a mobile converter app or a feature within your editor to generate 1080p versions of your clips.
- Edit with Proxies: Perform your entire edit using these smooth, lightweight files in an app like LumaFusion.
- Relink and Export: Before your final export, use the “relink media” function to swap the proxies for the original 4K files. Export your masterpiece.
This workflow gives you the best of both worlds: the smooth, fast editing experience of working with small files and the pristine, professional quality of a 4K final delivery. It’s the key to handling high-resolution content without needing a top-of-the-line desktop editing bay.
Key takeaways
- Professionalism in mobile journalism is defined by workflow and technique, not the price of your gear.
- Your smartphone’s computational power is a strategic advantage; learn to leverage its HDR, AI, and codec support.
- A disciplined approach to media management and a proxy workflow are the unglamorous but essential pillars of pro-level mobile production.
How to Launch a Professional Podcast Using Only Mobile Equipment?
The principles of mobile journalism—agility, accessibility, and professional workflow—extend far beyond video. You can apply the exact same “Mobile Studio” mindset to launch and produce a high-quality podcast using only the equipment in your pocket and a few strategic, low-cost accessories. The notion that podcasting requires a soundproofed studio with thousands of dollars in microphones and mixers is a myth. Entirely successful shows are being produced from start to finish on mobile devices.
A prime example is the Irish Illustrated International podcast, which produces university football content entirely on mobile. This proves that with the right workflow, audience engagement is driven by the quality of the content and the clarity of the audio, not the perceived prestige of the recording environment. The mobile podcasting workflow is beautifully simple: record using apps like Anchor or Podbean, which often have built-in recording and publishing tools. For more advanced editing, you can use a mobile Digital Audio Workstation (DAW) like Ferrite, then upload directly to your hosting platform.
The barrier to entry has never been lower, but professionalism still matters. Clear, intelligible audio is paramount. A simple, sub-$200 setup can give you audio quality that is virtually indistinguishable from a traditional studio for the listener. The core components are:
- A small, versatile phone tripod for stable positioning.
- Two sets of wired lavalier mics with extenders for hosting interviews.
- A headphone splitter to allow both you and your guest to monitor the audio in real-time.
- A portable power bank to ensure you never run out of juice mid-episode.
When recording with two separate mics into one device, use the “clap sync” technique at the start of your recording—a single, sharp clap that creates a clear spike on the audio waveform. This makes aligning the two audio tracks in your mobile editor a simple, one-second task. This is the essence of mobile workflow: simple techniques that deliver professional results.
The tools are in your pocket, and the professional workflow is in this guide. The technology has been democratized, removing the final barrier between you and the stories that need to be told. It’s time to stop waiting for a bigger budget or a better camera. Start building your mobile studio today and go tell those stories.